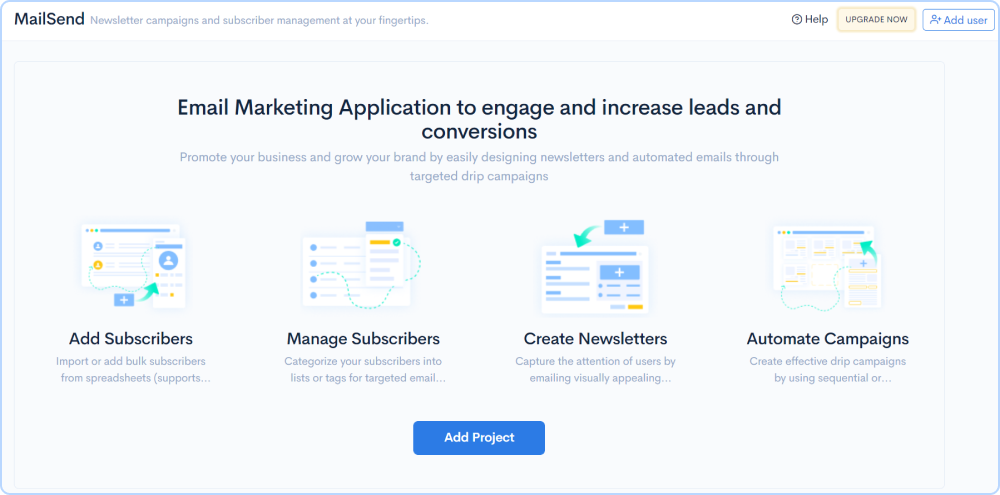
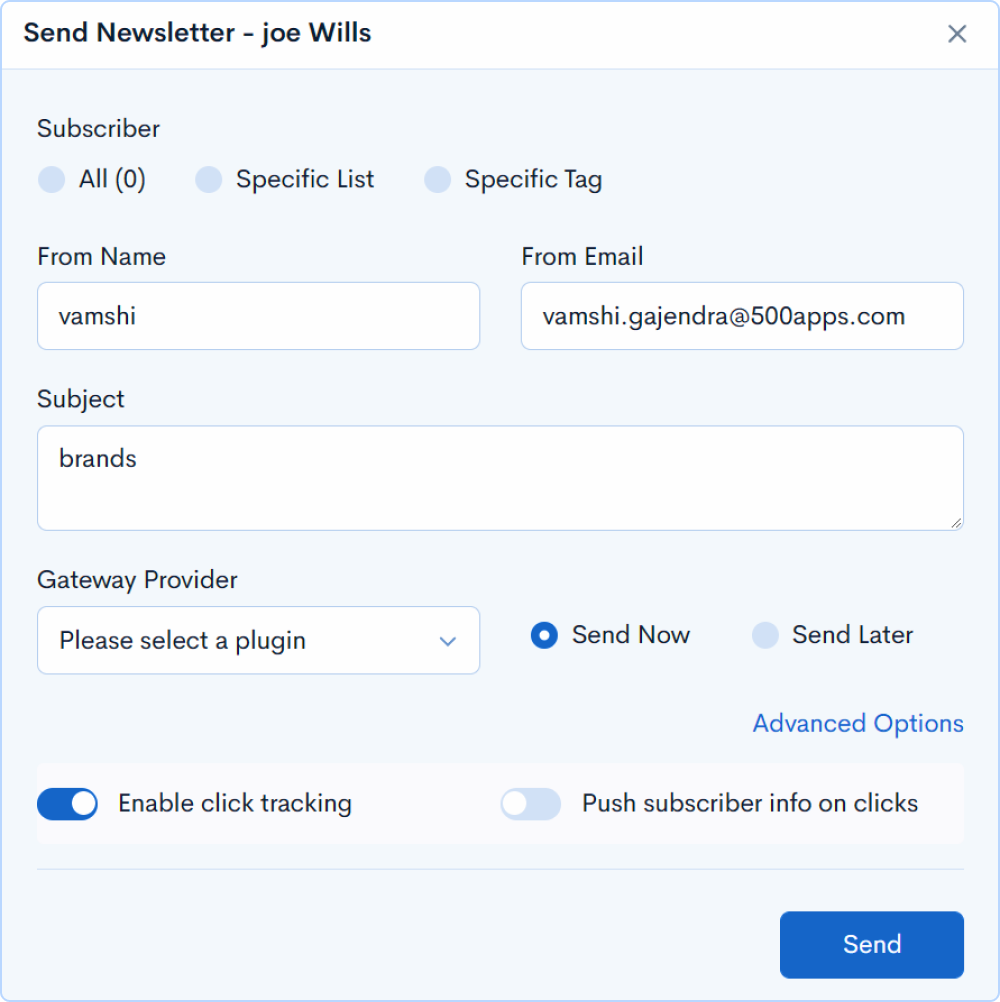
MailSend is an effective email marketing platform used by Fortune 500 companies. Your entire email marketing campaign could be done in one spot, from designing newsletters to sending them to subscribers.
Through MailSend, you can send and manage an infinite number of email newsletters and drip campaigns. You can engage with your audience and increase your list using drip emails.
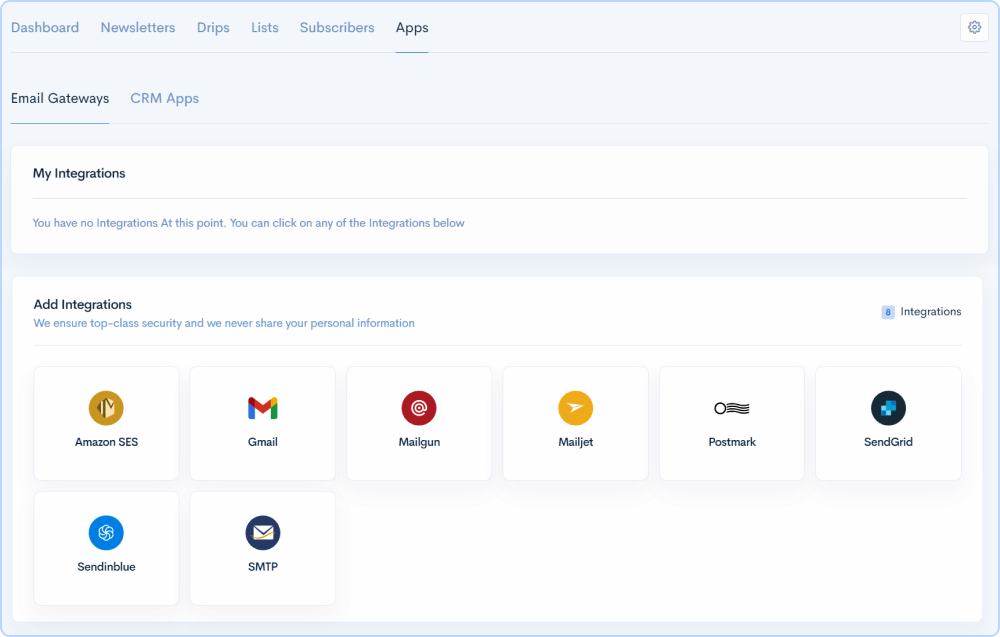
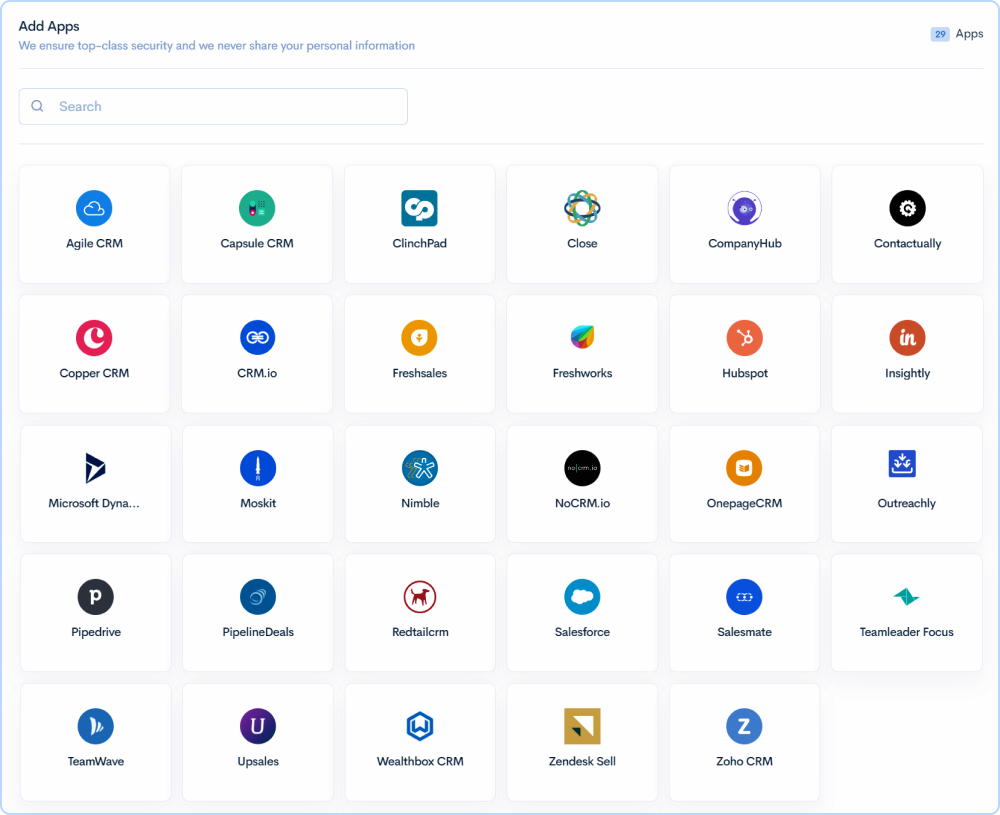
To send mass emails, you can use email carrier services like Amazon SES and SMTP. You can indeed track and monitor your CRM apps by integrating with major CRM software. Using merge fields, custom conditions, date functions, an in-built drag-and-drop email builder, and pre-designed templates, you can customize your emails with MailSend’s Image Personalization tool.
We offer top features to our customers to give them better reach and engagement, deliver or schedule stunning newsletters, and effectively connect with a larger audience.
To execute effective email campaigns, create drip campaigns. Design, manage, and integrate online forms into email campaigns. Develop information decisions and instantly optimize email marketing. Get powerful email analytics for all your email marketing campaigns to measure the performance of your email marketing campaigns and make improvements to optimize them even more. You can also monitor and update all of your subscribers' email lists. We provide our users incredible value at a fraction of the cost.
Let's discuss projects now.
To get started, press the Add Project.
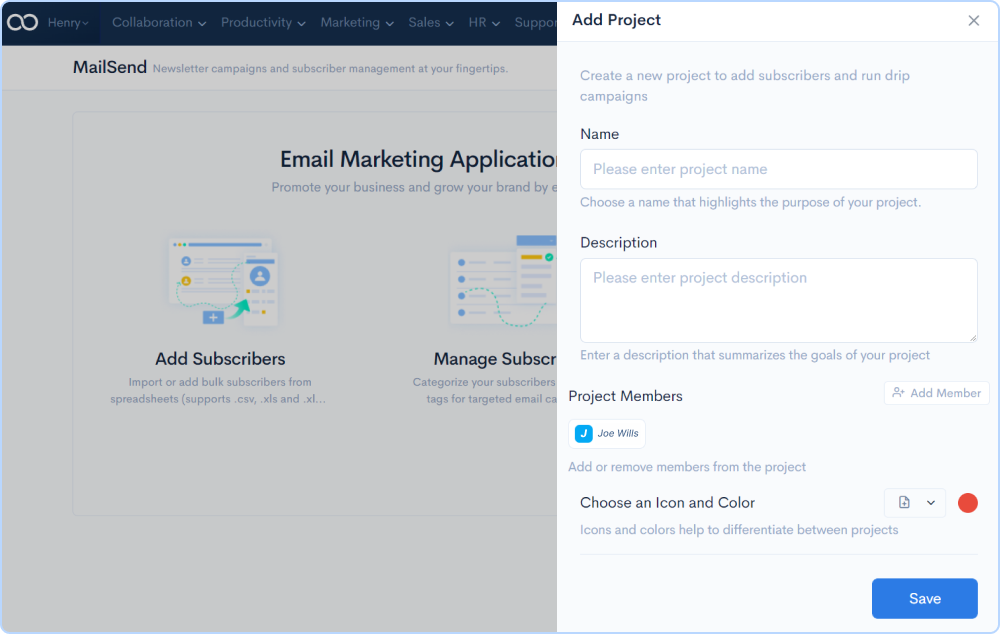
You can modify and delete a project at any moment in MailSend. Hover over the project name card and click the edit and delete icons for the appropriate actions.
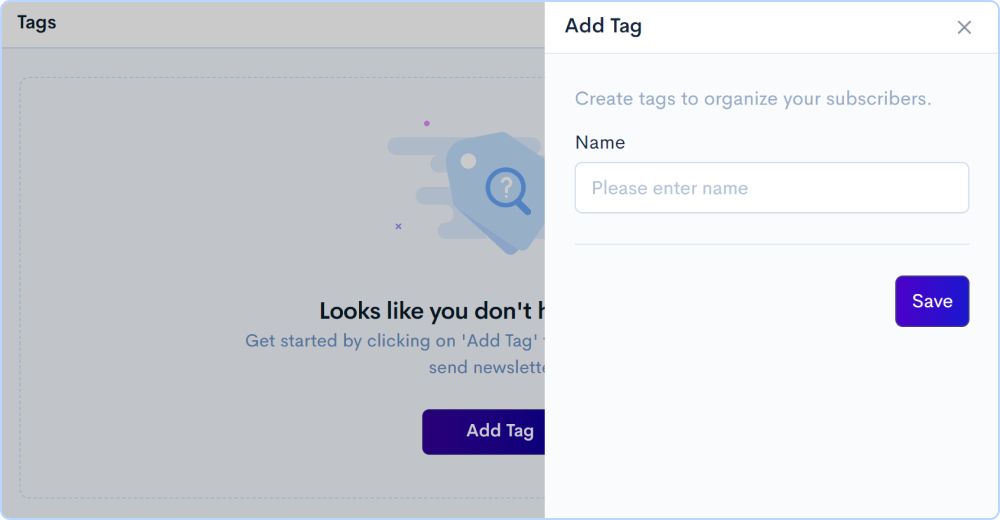
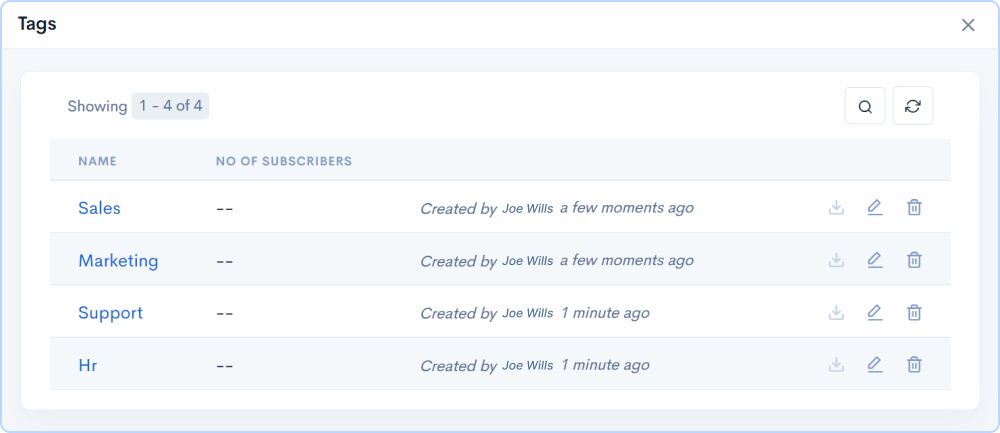
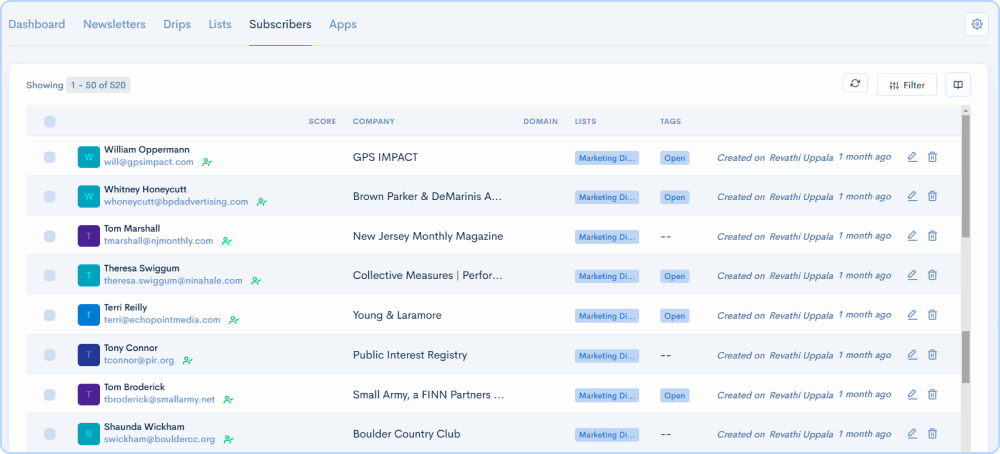
Email Marketing Managers will have many subscribers to track and manage. We provide tags functionality that can be used to assign and easily track subscribers.
Let's start creating tags
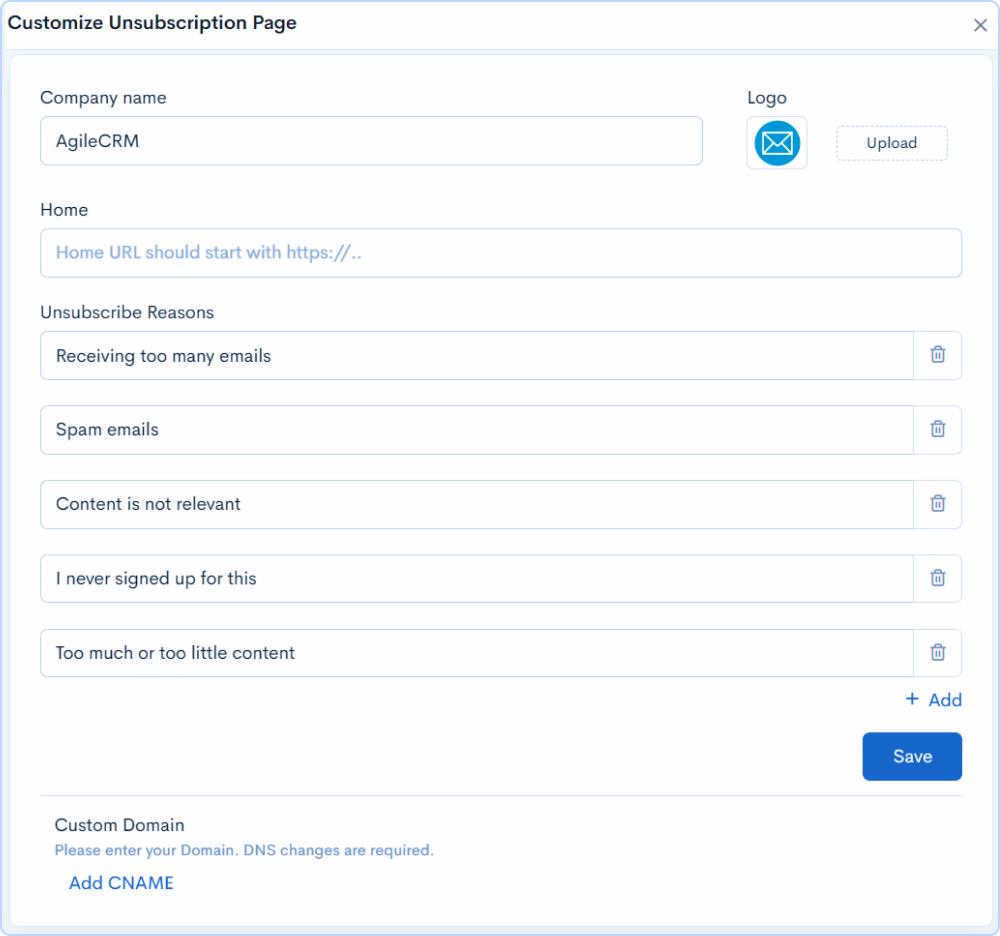
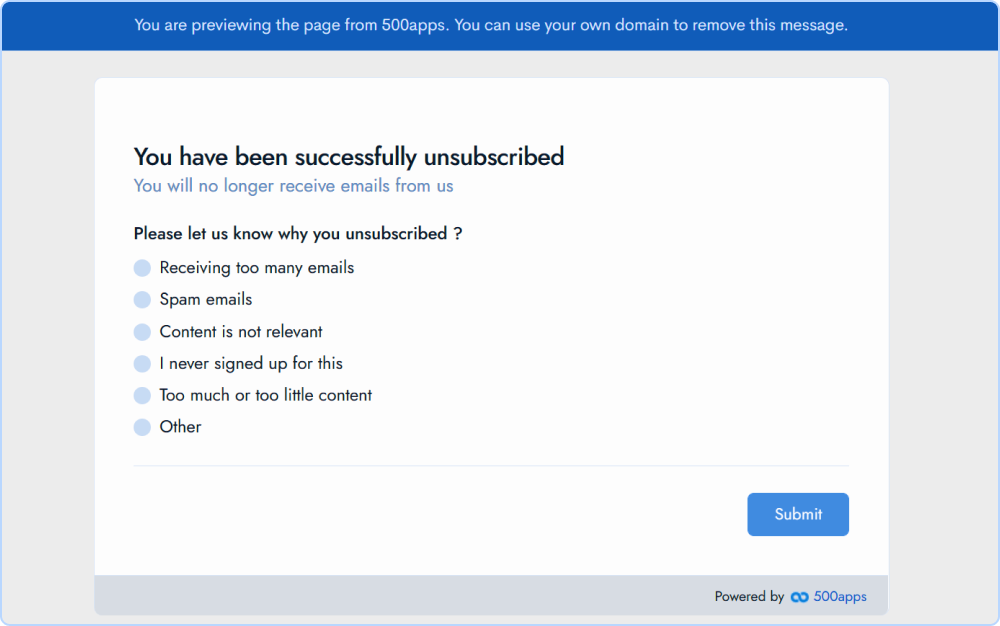
Now let's set up our unsubscribe page for our newsletter campaign so that users have the option of unsubscribing to our emails.
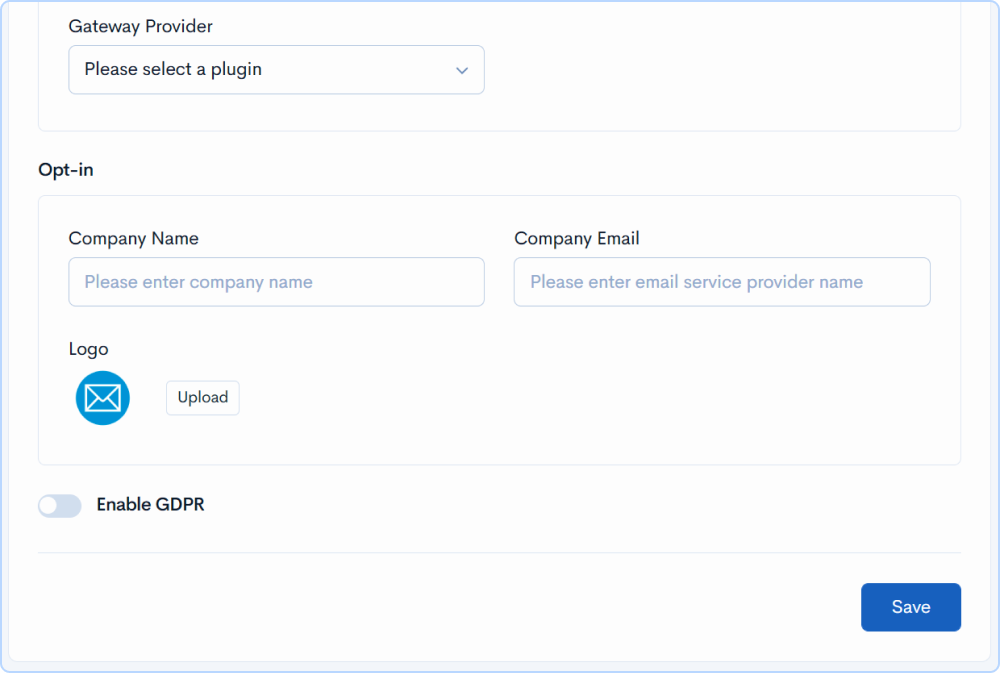
MailSend is a global application and follows GDPR compliance so using MailSend you can send newsletters to worldwide users.
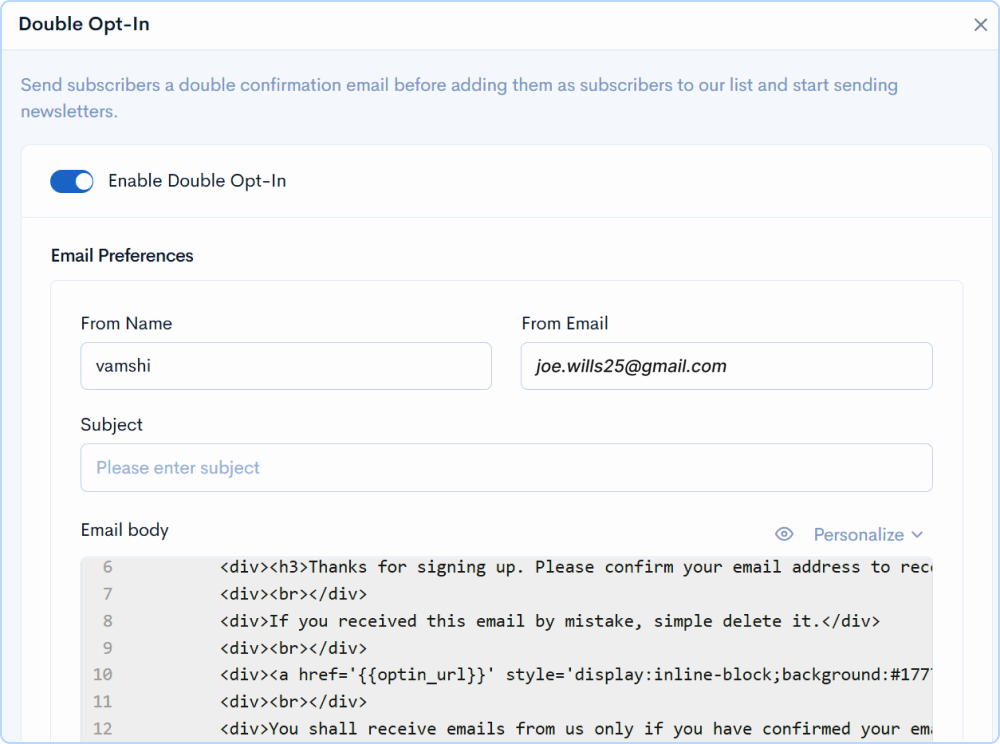
Let's start building our opt-in emails for your email marketing campaigns using MailSend.
To enhance the experience of using the enterprise email marketing software. We offer webhooks too. You can configure these webhooks to pass and retrieve data from your web services and integrate with the other apps too. These triggers can come really handy for any business.
Our webhooks need confirmation. They are expected to give an output. MailSend checks for all that before we accept them as webhooks.
You can integrate events in MailSend applications with other applications, using webhooks. Click on the gear icon and select webhooks.
Enter the webhook URL of the application you want to integrate to and select the trigger action and paste it into the field.
For example, if an email is unsubscribed, then I would like to add a tag NI to that subscriber that identifies the subscriber as not interested in my CRM application.
MailSend provides three webhook events for you to integrate MailSend with other third-party applications. The events are Email Open, Email Click, and Email Unsubscribe.
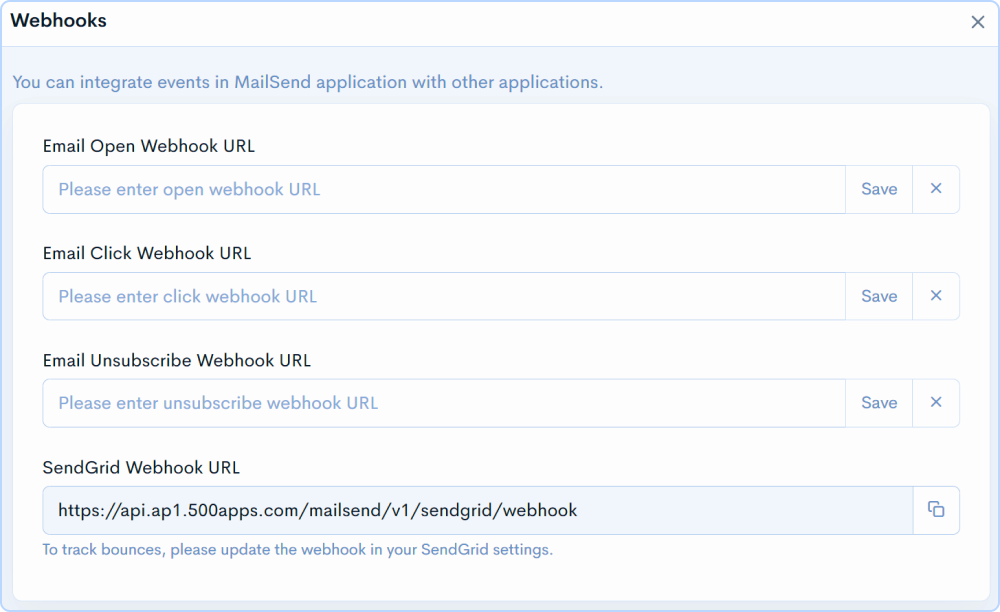
You can also integrate MailSend with the SendGrid application to track the email bounces Click on the gear icon and select SendGrid webhooks. You can copy and paste this webhook URL into the Sendgrid settings.
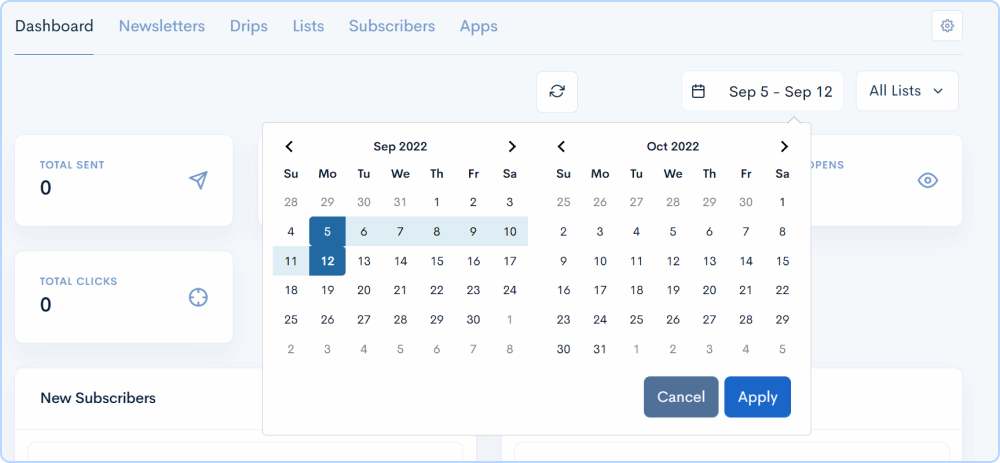
Now to see the overview of your email marketing project
Click on the dashboard and you see the stats on the total emails sent, opens and clicks, and no. of subscribers.

View the data by selecting a date range.
MailSend allows you to view data insights based on the subscriber list. Click on the lists button and select the subscriber list of which you want to see the data.
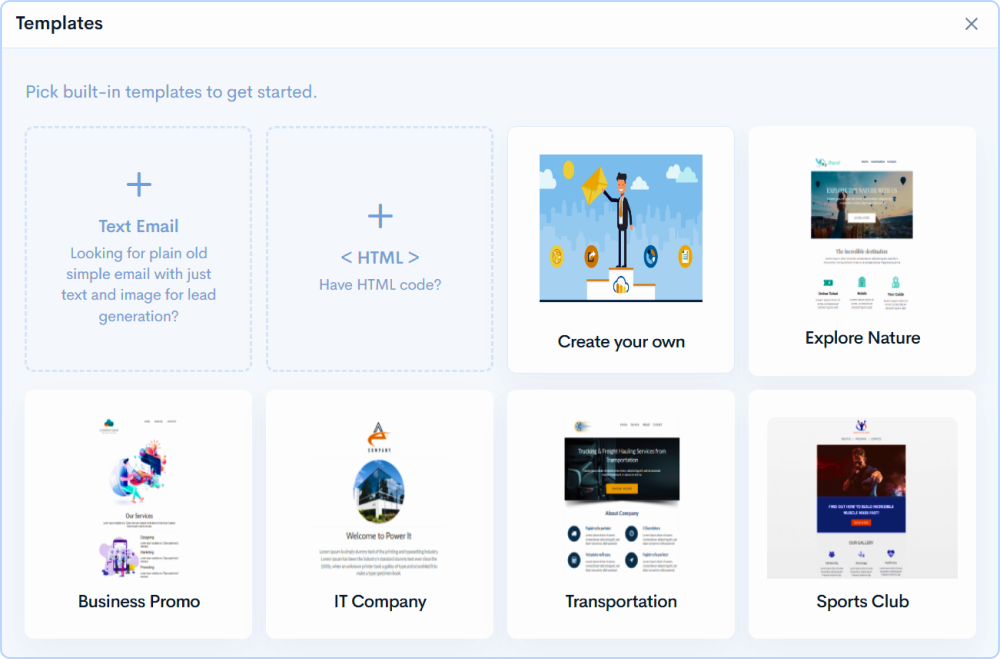
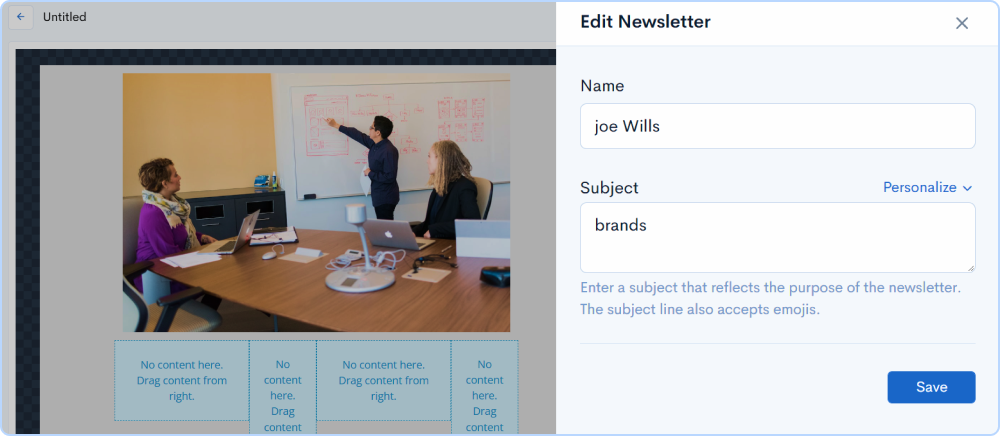
Now let's start building Newsletters,
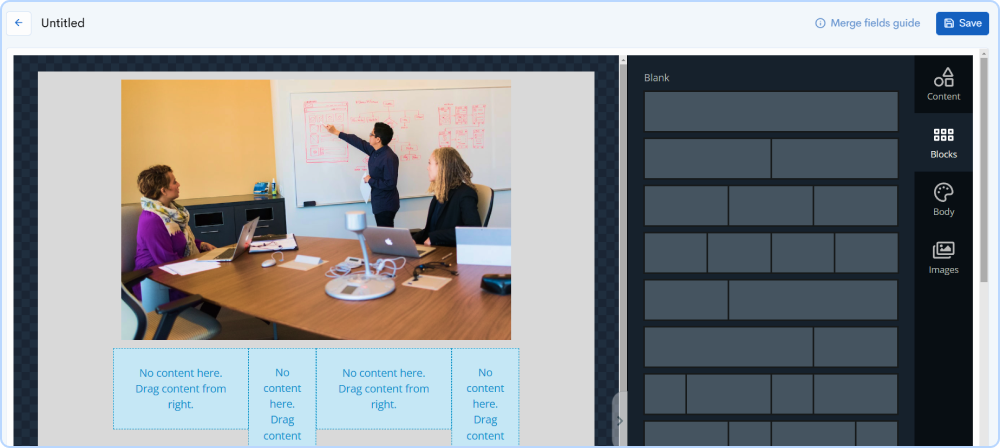
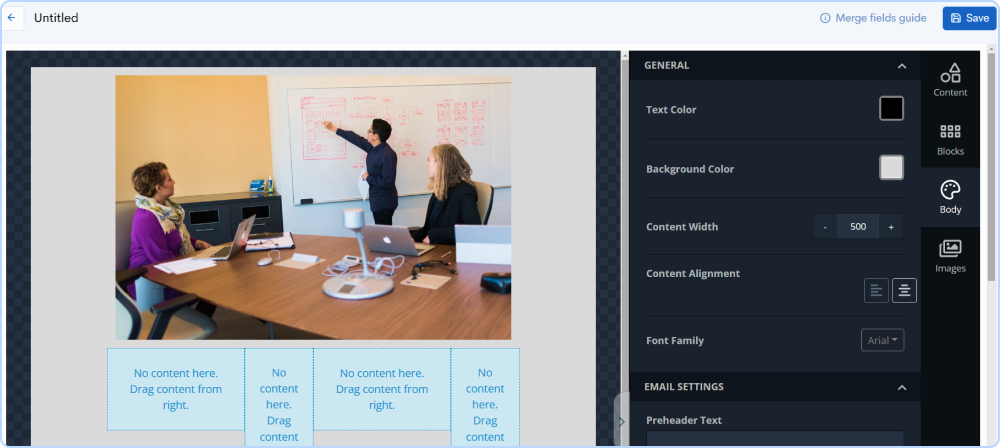
Now, I will walk you through the components of the content tab in MailSend.

Can be used to insert columns in the newsletter, you can customize it for both Mobile and Desktop devices. We provide a lot of variety of options that you can choose from. You can customize it using this menu.
It can be used to insert a call-to-action button in the newsletters. For example, Sign up, Log In, and Buy Now.
It can be used to divide the columns into two parts.
Can be used to enter the heading of the email. We can customize it using the left-hand side menu.
Can be used to insert HTML in the newsletter.
This component can be used to insert images in the newsletter. We can upload images from the local computer. We can customize images and insert URLs into these images using the menu. It can be used to customize images for both desktop and mobile devices.
This component can be used to insert menus into the newsletters. We can customize the menu using the left-hand side menu.
This component can be used to insert text into the newsletter. We can customize the menu using the left-hand side menu.
Click on the blocks tab and select the block you want to insert into the newsletter. We can customize the menu using the left-hand side menu.
Click on the body tab to customize the body of the email newsletter. You can customize the color, text size, alignment. You can also insert the Preheader Text. It is the subject line viewed by the user in the email.
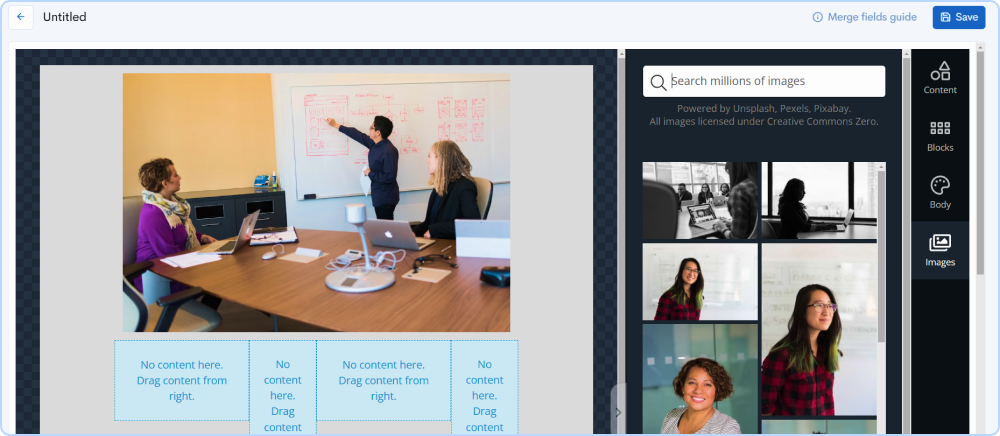
Click on Images Tab to insert images, you can select from a million images from our third-party integrations for free, and all these images are licensed under Creative Commons Zero.
For example to see the opened emails list by subscribers, select opened from the dropdown.
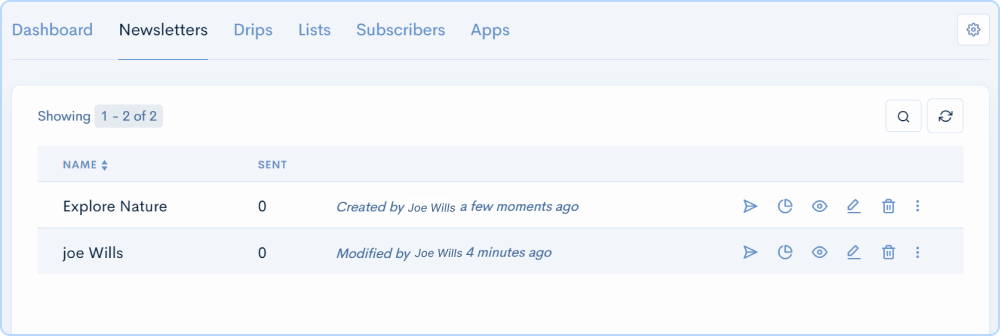

To Search newsletters by name instantly.
To view the latest updated results of the newsletter campaigns.
MailSend provides you the option to automate your email marketing campaigns.

In the visual builder, there is a list of all powerful nodes. Begin from selecting the desired nodes, you can drag and drop them into the designer or simply click on the node.
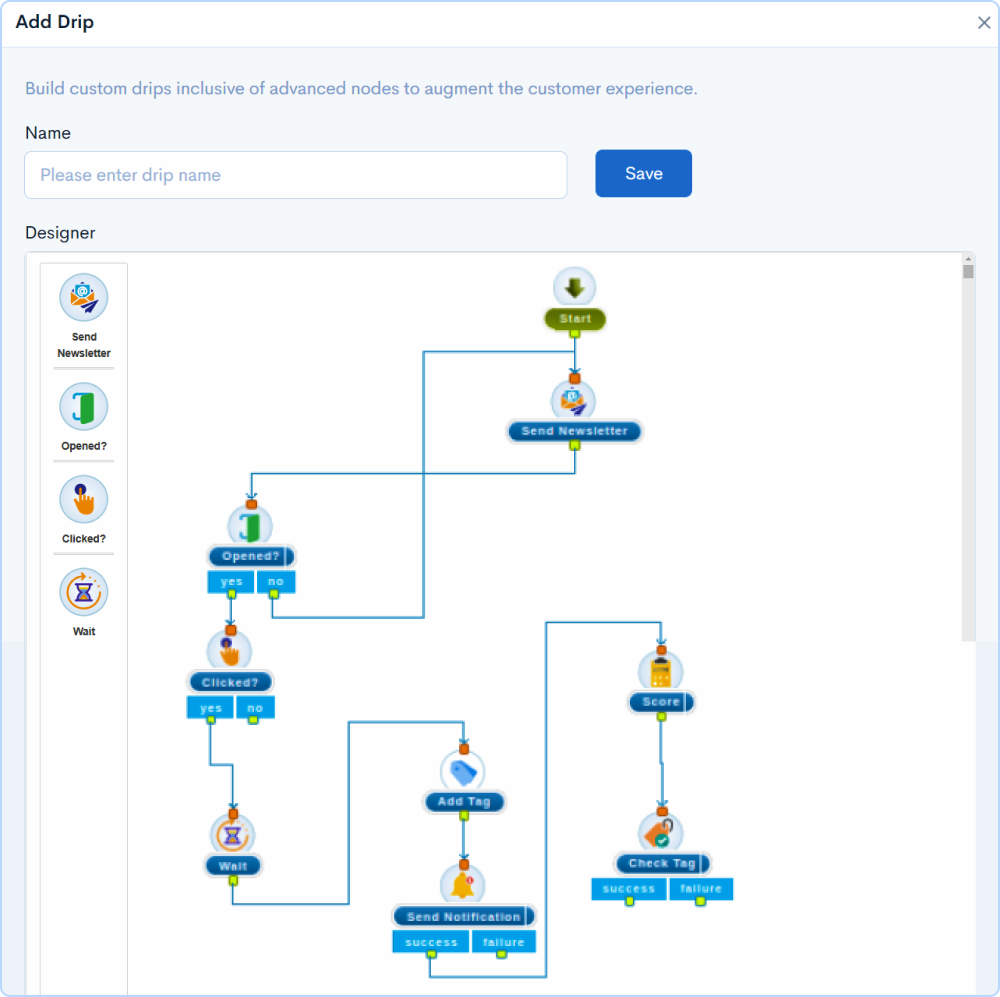
Let us see simple email drip campaign set up now.
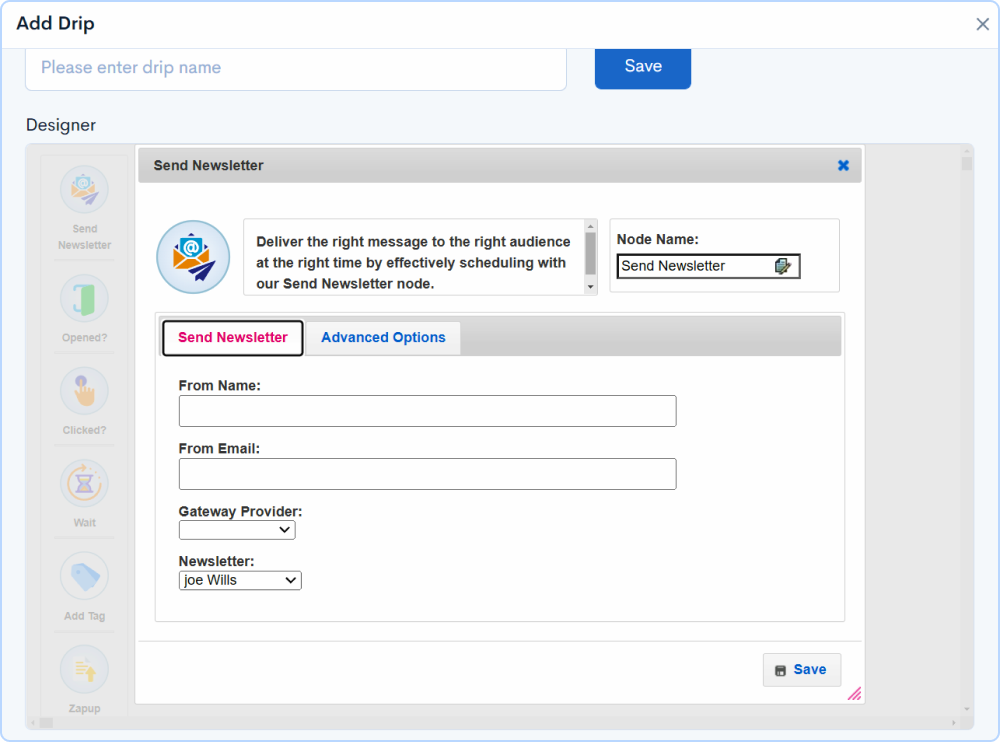
you can save the newsletter node and connect to the other nodes.
This node allows you to Check if the subscriber has opened any of the emails sent in the given wait time And if the subscriber has not opened, you can choose the next action to send the mail again.
For example, if the subscriber has not opened a newsletter after three days, then it can be configured to send the same newsletter again.
you can configure the Maximum wait time in Days, Hours, Minutes and save
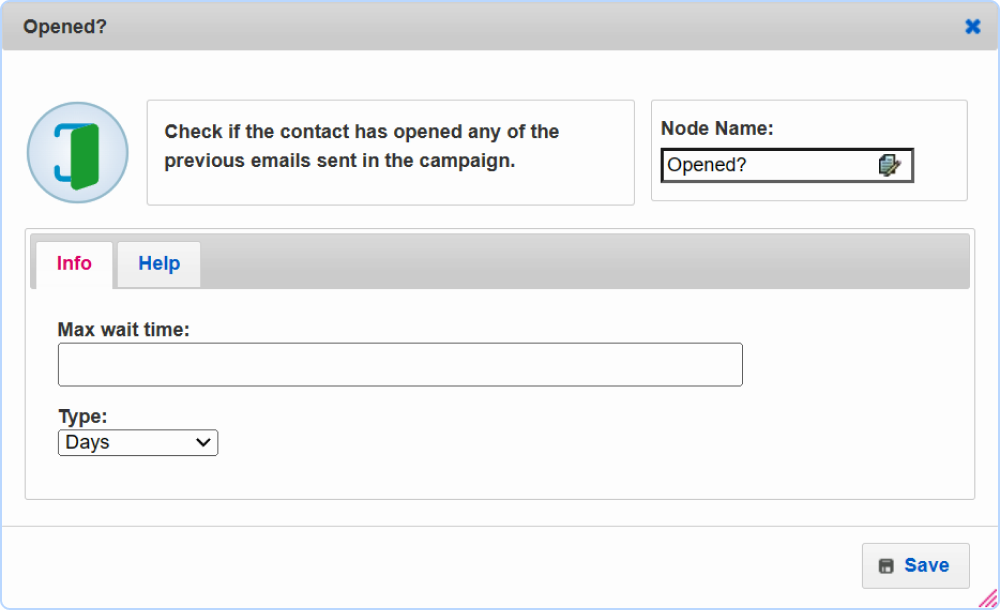
Here you will find the yes or no paths. Connect the opened node to the next nodes, you want to choose as an action for the success and failure of the condition.
Now, let's select the clicked Node and configure the max. wait time and click on Save. This node enables you to choose what action to be taken if a subscriber has clicked on the given link in the newsletter.
For example, if the subscriber has clicked on the given link in the particular newsletter, it shows that the subscriber is interested in the product, and the subscriber details can be sent to your CRM application.
Now let's select the Wait Node and configure the days, hours, and minutes for the wait time limit and click on Save. You can configure the Maximum wait time in Days, Hours, and Minutes and save. Here you will find the yes or no paths. Connect the opened node to the next nodes, you want to choose as an action for the success and failure of the condition.
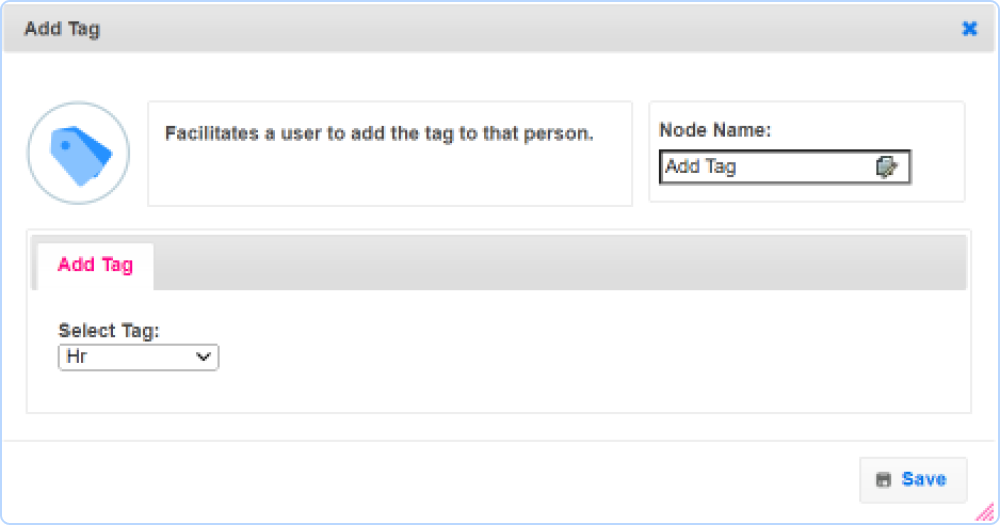
Now let's select the Tag Node and configure the tag to assign for a particular condition. And click on Save. This node enables you to assign a particular tag to a subscriber when the condition is satisfied.
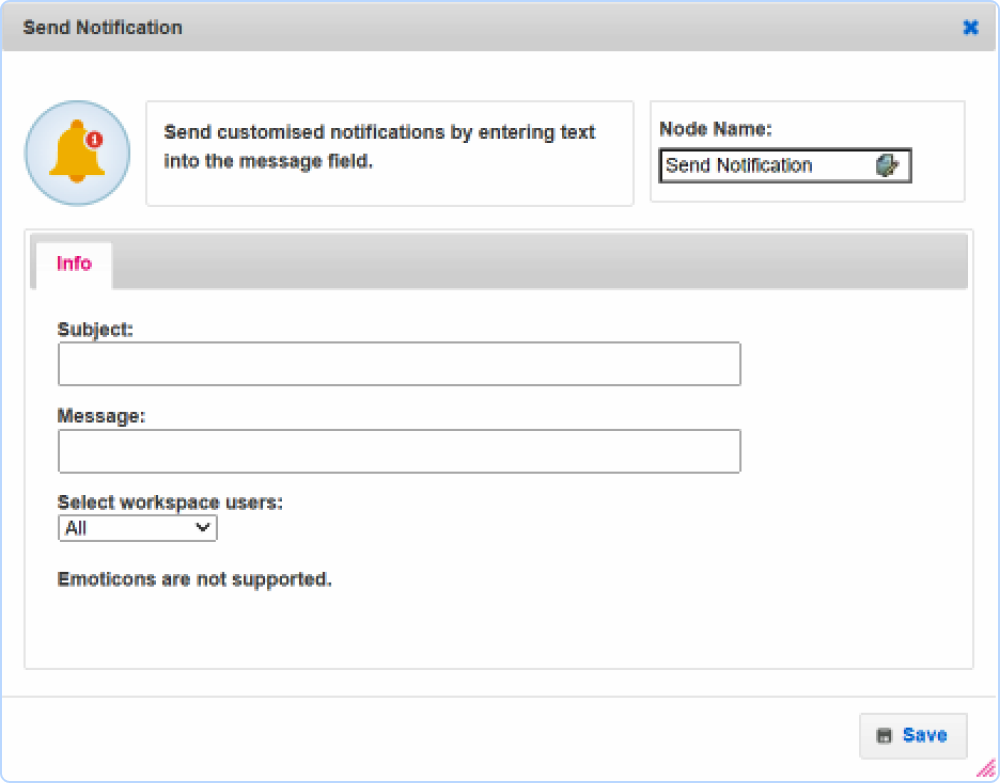
Now let's select the Send notification node. You can use the Send notification node to send a message to all your workspace users about a newsletter or subscriber. Enter the subject and the message for this notification you want your workspace users to see. You can also select which workspace users should see this message from the drop-down.
Now, let's select the REST API node. You can use the REST API node to integrate your workflow with your web infrastructures like routers, DNS settings, and databases. You can Push and retrieve data from and to your other applications.
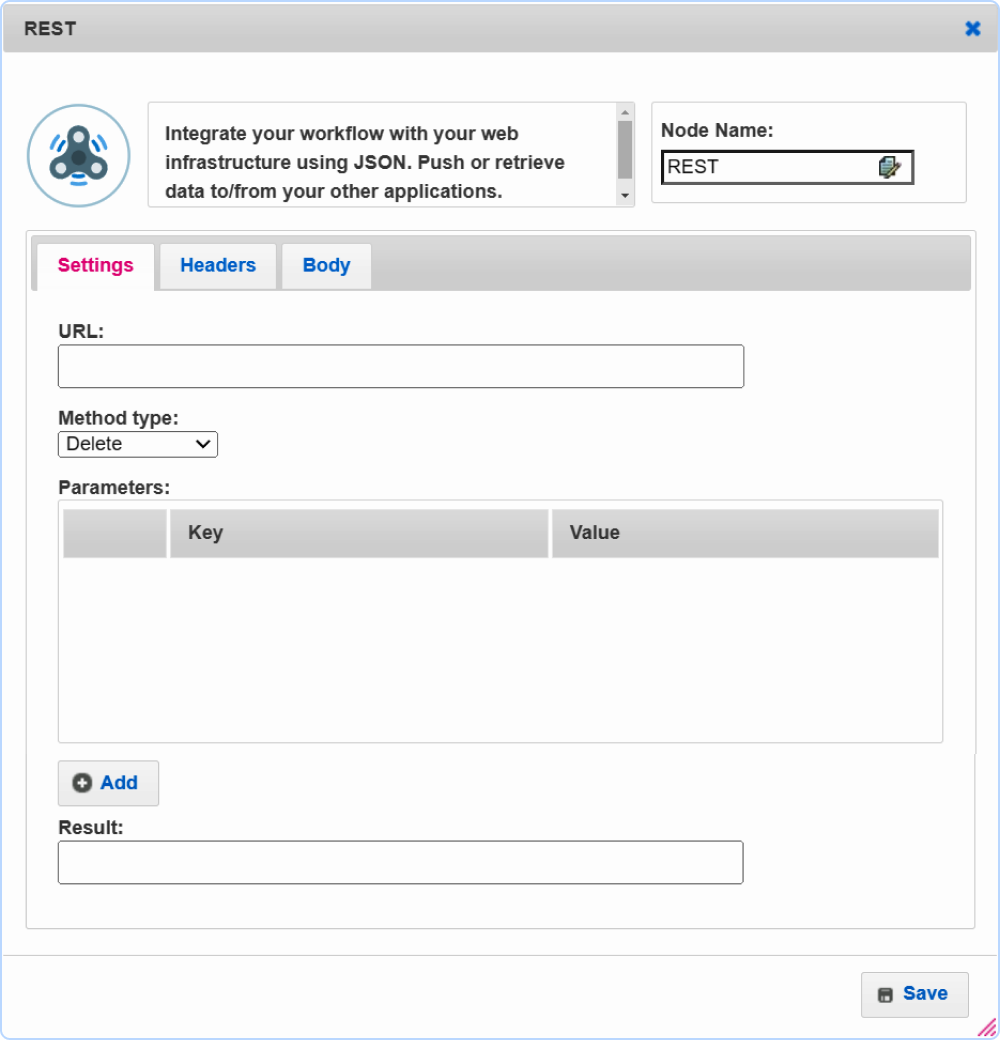
For example, you integrate your email marketing campaign and store details regarding the campaigns in your cloud database.
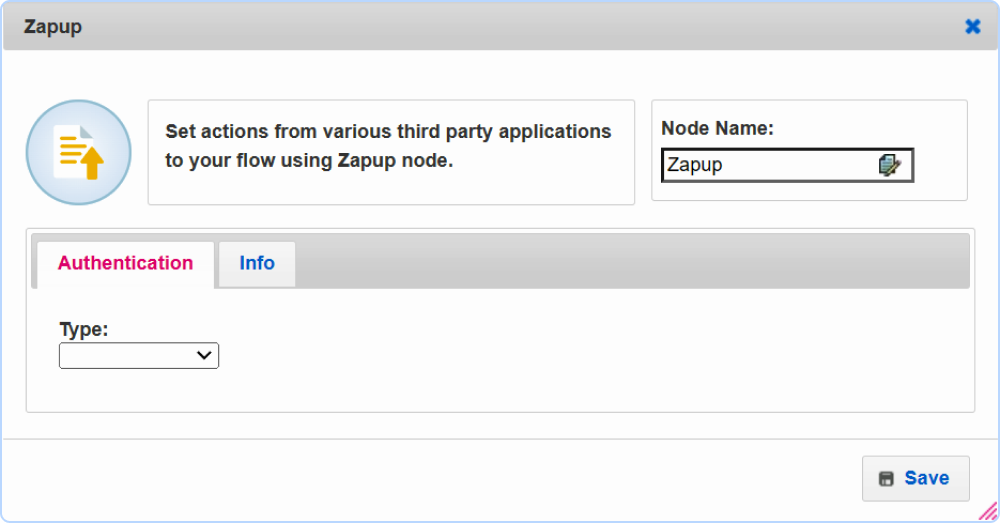
Zap up is another powerful app that we have built and is included in the subscription. You can find ZapUp under the Productivity category. Use this node to set up triggers in the workflow and to integrate with third-party applications.
For example, Connect MailSend with your CRM applications and add subscribers from your email marketing to your CRM applications automatically.
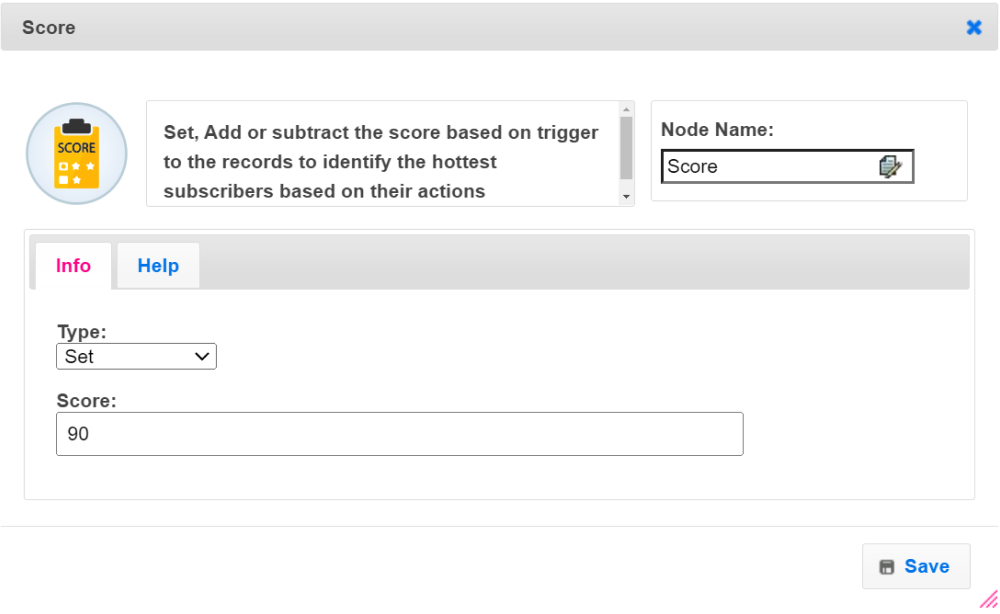
You can use the Score node for the scoring system in your email marketing campaign. You can Set, Add or subtract the score based on trigger conditions and enter the value and click save.
For example: If the subscriber has clicked on the link within 12 hours of sending the link, the subscriber can be assigned 50 points. The higher the points, the more chances of converting the lead into a customer.
Now let's look at the set custom field node
For example, if the subscriber has opened a particular newsletter, then that subscriber can be marked as interested in the field.
Now let's look at the check tag node yet another powerful node. You can use the check tag node to check the tag of the subscriber as the trigger action. Enter the tag name and click on save. For example, if the subscriber is tagged as New, you can send him a particular newsletter.
Now let's look at the if condition node yet another powerful node. You can use the if condition node to compare the fields, and if it satisfies the condition, it will act as the trigger action. - Select the if the condition from the dropdown - And select the field to be compared with from the dropdown - And Select the condition to compare from the dropdown - And choose the variable to be compared to and click on Save
For example, You can send a Happy women's Day newsletter to all the subscribers whose salutation is Ms or Mrs.

Now that's all about the email drip campaign. After you are done creating the drip campaign Enter the name of the camping and click on save
MailSend allows you to create a copy of the drip campaign you have created using the duplicate icon.
Now we can see the drip campaign reports of the drip campaigns by clicking on the drip details icon.
We can see a detailed view of the campaign.
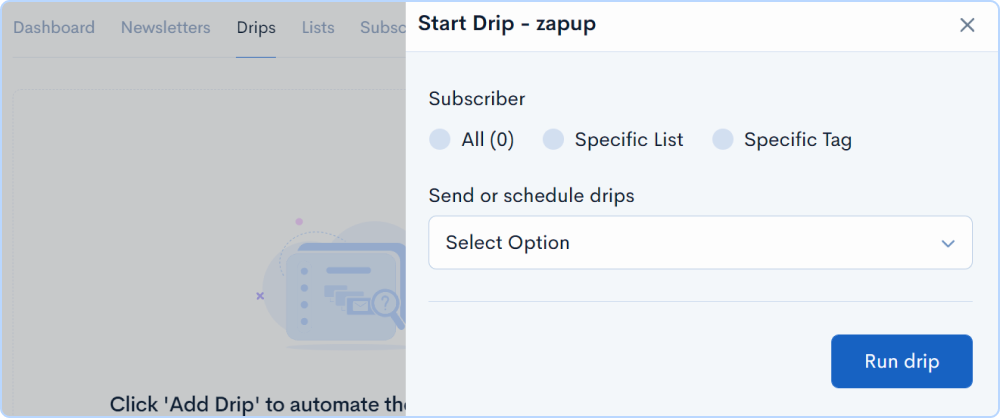
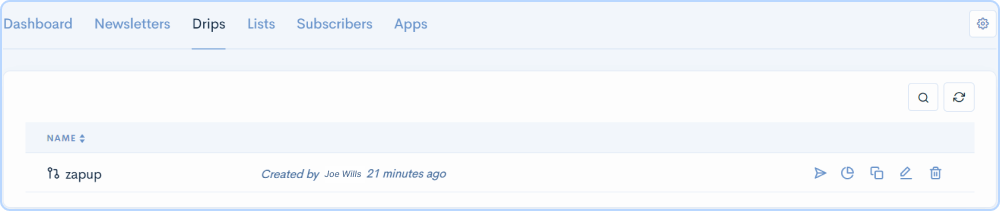
MailSend allows you to send drip now or you can schedule send, click on send later to schedule send later and select the date and time you want to run the campaign, and click on Run drip.
MailSend allows you to edit the drip campaign you have created using the edit icon
To instantly Search drip campaigns by name.
As Email marketing managers will have many subscribers to track and manage, we provide lists functionality that can be used to categorize subscribers based on their campaigns. You can use these lists to automate your newsletters campaigns to send the same newsletter to multiple subscribers.
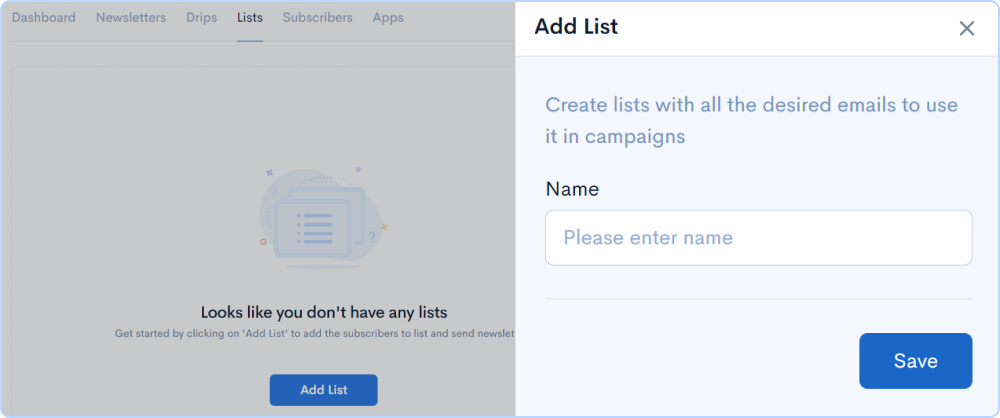
Click on the list name to add the subscribers to your list You can search and add subscribers to the list You can send emails directly to the list of candidates by clicking on the send Icon
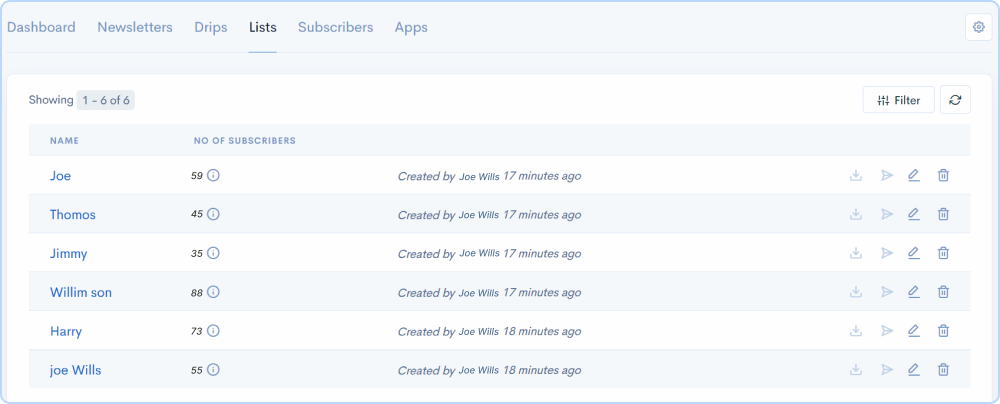
To instantly Search lists by name.
You can use the Filter option to search and filter out the subscribers based on the user created. Enter the fields you want to search and click on apply.
MailSend allows you to bulk delete Subscriber lists when you have more than 10 lists, click on the checkbox to select all the list and click on the delete button in the menu bar.
Now let's add subscribers to your email campaigns. Subscribers are the leads or prospects for your email marketing campaigns. You send your newsletter and campaigns to these subscribers.

You can use a column picker to choose which columns to view in the list Tab.
MailSend allows you to bulk delete subscribers when you have more than 10 subscribers using the multi-select checkbox.
Go to the next level with ![]()
Get 50 other apps with MailSend - Join the SaaS Revolution - 500apps, $14.99/user flat pricing, 24/5 Support (Phone/Email/Onboarding)
